Showing posts with label DIY. Show all posts

Tuesday, April 30, 2013

Thrifty Thinkin': Homemade Syrup-Filled Banana Pancake Bites

Yet another quick and easy breakfast to make ahead and enjoy all week: Pancake Bites!

As we know, I love cooking anything I possibly can in my muffin pan. I also try and cook a week's worth of breakfast on Sunday afternoon, so I can quickly reheat in the oven or microwave. This way my Airman husband gets a decent homemade breakfast before he is out the door at 6:30 and I get to not get up at the butt-crack of dawn and cook for him. Win-win.

Last week I made syrup-filled mini pancakes, or "pancake bites" in my muffin pan and my husband enjoyed them all week long.

You'll need:
*oh, and your favorite syrup will be necessary too. The real stuff is always the best!!

*preheat your oven to 350!
*I used about a cup and a half of dry pancake mix and added the needed ingredients accordingly. Follow whatever your normal pancake routine would be. My cup and a half came out to 8 little pancakes/muffins.

*doesn't have to be bananas. pick your favorite pancake filling, or leave them plain!

*adding the syrup after the 10 minutes allows for them to be syrup "filled." If you mix it in with the batter it would sort of cook off by the time 25 minutes is up

*though these are called "syrup filled" I suppose they are more syrup "infused." When you bite into one it isn't like a fruit gusher (why can I not think of a better example!?) or a jelly filled donut- nothing will ooze all over your hands. The syrup soaks into the mostly-cooked pancake batter. When they are done you can still taste the syrup and they are a little sticky, but it has dispersed throughout the pancake bite. You could do without syrup, but I think it makes them more like pancakes and less like muffins. Another option would be to bake them plain and dip them in syrup later if you aren't rushing out the door.
*easy reheat: 5 minutes back in the oven at 350 or 45 seconds in the microwave. Keep in the fridge (in plastic baggie) to enjoy all week long!


Sunday, April 28, 2013

Hand-Painted Art for My Kitchen: "Where You Invest Your Love..."

This post has been a long time coming. This project was finished a couple weeks ago, but I was waiting to get it hung up (with the help of my husband) before posting.

As you know, I live in a little cook-cutter, white walled, baby house on an Air Force Base. Base housing is far from character-filled...in fact it is a little stark white and very un-personal. We are allowed to paint or hang stuff, but it must be returned to the state we found it in upon leaving, which being in the military, you never can be sure when that will be. Someday we will live in an old house, full of charm and character, but for today we don't. For now, I am trying to make my little baby house as homey, charming and personal as I can without investing to much into it, as it is, after all, only temporary (only probably a year or so).

We were able to purchase plenty of furniture for our house together and now I am left with the task of doing the little ("girly") tasks of decorating. I'm not a huge fan of white walls, and white walls without art are super sad. I, however, have trouble finding art that I like within our budget, so I have therefore be doing the DIY thing (which I do anyway but..).

About a month back on a weekend, my husband and I were at his shop (he works in a Civil Engineering Squadron doing Structures). They have a bin of junk wood and scraps. He was throwing some stuff in there when I spotted this...cabinet door-like thing...
I am still not sure what it was. Looks like a cabinet door, but it has 6 weird little hooks on it, and no signs of and hinges ever being there so...it's a mystery. But I liked it. It looked like it wanted to be painted on. I waited another week of it being in the scrap bin before I ..*pilfered* it for my own.

I decided on painting some of my favorite song lyrics on it. "WHERE YOU INVEST YOUR LOVE, YOU INVEST YOUR LIFE." (Mumford and Sons: Awake, My Soul). If I was the sort to get tattoos, that would already be on me somewhere, but as I am not quite that sort I figured painting it as art for my kitchen was a close substitute. I pondered getting some stencils to make the letters crisp and precise, but that is not really indicative of myself. Instead, I free handed it. I did pencil in some lines to help keep it all straight- I have an horrible inability to make straight lines without ruler guidance.
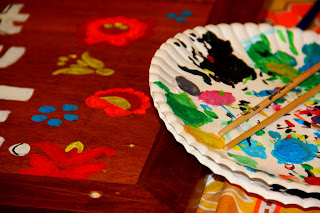
 Lyrics alone don't make a painting for me, so I bordered it in some Hungarian-inspired flowers. Hungary has some gorgeous embroidery which has always been part of decorating my family's home (my grandfather was from Hungary and one of my sisters is adopted from there), so I decided to bring some into mine.I am incapable of embroiderying such beauty, but painting it is fun.  I considered painting flowers to also mimic Polish paper art (called Wincynanki), to honor my Polish heritaged husband. But it is incredibly detailed and when I practiced on other paper my flowers looked awful in paint, so I scratched that plan and stuck with my own roots. When I finished my couple days of painting it, I sealed it with spray varnish.
I am pretty pleased with how it came out. It's unique, I think. That's probably why I like it so much. JoJo helped me get it screwed into our kitchen wall and it now is hanging over our little dinning area. Just one more little bit of homey charm to our house!
Still a little stark and sad, but getting happier! If you can't tell, I'm a fan of color. You can't see the rest of my kitchen in this photo, but all the colors present in the flowers are basically the color scheme of my kitchen. Anything with a folksy print, bright color, or vintage vibe is welcome. I suppose salvaged cabinet door wall art fits in nicely.
 

Tuesday, April 23, 2013

Home Tour: Our Base Housing Bedroom

Since moving to Washington I've had a significant bedroom downsize. While the husband was deployed at was living at home, sharing an over-garage, converted attic bedroom (of like 400 square feet)with one of my sisters. Walk in closet, room for 2 twin beds, a couch, 3 chairs, a desk, a table to seat 4, a keyboard, etc. It was BIG. And now I live on McChord AFB with my husband in base housing. I love our house. It is little and cute. But did I mention little. I am not sure of the actual square footage, or the specific square footage of rooms, but our bedroom is a lil' thing. However, I adore living here and actually being in the same geographic location as my husband. It's great.

When I moved out here and he returned from Qatar we had NO furniture to our names. I shipped some dishes and blankets, packed my clothes in a suitcase and that was it. We spent weeks on an air mattress with a open sleeping bag as a blanket and all our clothes in piles and suitcases (and we were plenty happy about it after 2 years of long distance and 6 months of deployment). Eventually we got a (super nice) mattress, but had to wait on our bedroom set to come back into stock. Since then it has been slowly progressing and looking more and more like a home.

Due to the temporaryness of being in military housing, we have opted not to paint or hang curtains (because we have to return it to as was upon leaving), so the challenge is finding other ways to make our house look homey. Black/red/white/tan is my favorite color combo, and it is on the approved as "not too girly" list by the husband. Slowly, our bedroom is coming together. We've been here for about 5 months; not quite there yet, but well on the way.

Here's a lil' peak:
air mattress phase
 
mattress on floor phase
 
Finally, about 2 months in, we got some furniture.
Hard to get everything in a picture, but we got a set with bed frame, chest of drawers, dresser, and one night stand (and I, to this day, remain nightstandless. Still hunting.)
 
While I greatly miss my walk in closet, I am very thankful for the closet space this house has. Our room as two decent sized closets with sliding doors. Separate closets are wonderful! Guess whose is whose?
 
I think art is a key way to turning a space into a home. However, we (I) have yet to find some reasonably priced art fitting for the bedroom. The words over the window are a decal from Urban Outfitters ($19)  that just arrived by mail last week.
 
 My plan is to take one of my own photos, probably something regarding nature or architecture (hopefully from our upcoming 1st Anniversary trip to HAWAII!- more details soon!), make it black and white, blow it up and hang it over the bed.
 
Little bits and pieces also make a home more homey.
I swapped out the red dresser runner for my vintage hand made British flag.
I picked up a unique lamp for $5 at Goodwill.
 I continue to hoard throw pillows.
 
I also recommend finding yourself a rascally furbaby to shed on your blankets to add character to your home. Our furbaby finds a freshly made bed to be most exciting (jumps, runs, spins and digs) and cameras are also pretty fun to get in the way of.
 
As time and budget allows I hope to keep adding character and personal touches to our bedroom.
The husband was content once we had furniture, but for me it is all a little too...new...I hope to find some older, used and vintage pieces to mix it up a little.
 

Wednesday, April 17, 2013

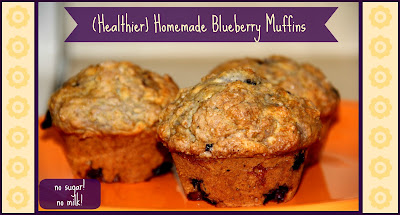
Thrifty Thinkin': Healthier Homemade Blueberry Muffins

I am rather infamous for things I can cook in a muffin pan. Breakfast quiches, cupcakes, rolls, pancake bites, stuffed pizza bites, brownies, mini popcorn balls, baked macaroni...etc. A muffin pan is probably my #1 kitchen necessity. However, up until this week I had never made actual muffins in my muffin pan. I had actually never made muffins in my life.
Usually every weekend I try to come up with a reasonably quick and healthy breakfast that I can make in advance and then either quickly heat in the oven of in the microwave before my Airman husband has to get to work in the early morning during the week. Usually it involves eggs (and probably in a muffin pan). But this week I thought I might give something else a go- BLUEBERRY MUFFINS!
I did a little pinterest hunt and came up with this: Blueberry Muffins According to Martha Stewart. Then I did a little tweaking of my own. I followed her recipe exactly except for 3 minor changes. Instead of the 1 1/4 cups of white sugar (something I do my best to avoid in large amounts) I substituted in 3/4 cups of honey.  Because of the honey burning easier than white sugar, I also lowered the oven temp from 375 to 350 instead. Then, instead of the 1 cup of milk (something I also try and avoid in large quantity, especially now since some milk contains unlabeled aspartame), I substituted 1 cup of unsweetened original flavored coconut milk. You could also use soy milk, almond milk, etc.


So:  Here is Martha's Recipe (Martha Stewart Living, July/August 2000), with my changes in bold.
  • 6 tablespoons unsalted butter, room temperature, plus more for tins
  • 3 cups plus 2 tablespoons all-purpose flour
  • 3 teaspoons baking powder
  • 1 teaspoon salt
  • 1 1/4 cups sugar, plus more for sprinkling (3/4 cups of honey. I did sprinkle a little white sugar on top though)
  • 1 large egg
  • 2 large egg yolks
  • 1 teaspoon pure vanilla extract
  • 1 cup milk (1 cup unsweetened coconut milk)
  • 1 3/4 cups blueberries
 
I preheated my oven to 350. If using white sugar instead of honey, go ahead and set it to 375.
 
Butter your muffin pan. This recipe makes 6 large muffins or 12 small muffins. I went with the 12.
 
In once bowl, mix/sift together your flour, salt and baking powder and set aside.
 
In another bowl, cream butter and sugar/honey until fluffy, which will take about 3 minutes with an electric mixer, or about 5 with a wooden spoon. As I don't yet own a mixer of any type, I used a google old fashioned wooden spoon for this whole recipe. If you have fancy gadgets like Martha, go ahead and use those.
 
Add in the egg and egg yolks, along with the vanilla to the sugar/honey and butter mixture. Then gradually add in parts of your flour and milk/coconut milk until it is all combined into a dough. This can be done on low with a mixer or by hand. Then gently fold in your blueberries. I used frozen, but fresh would be equally delightful. This is the fun part because you get to watch the mixture turn blueishpurple.
 
Divide the muffin batter between the tins. Sprinkle the tops with sugar. Bake until golden. Approximately 45 minutes for large muffins and about 30-35 for small muffins (this would depend on which temperature you set your oven too, so keep a watchful eye on them!). Before removing from the pan allow to cool for 15 minutes.
Once cool, I removed them from the pan and pack them up in a ziploc baggie, ready to go for the rest of the week. Now at 6:30 AM all I have to do it set a muffin in the microwave for about 45 seconds, slap some butter on it and hand it to my husband as he goes out the door. Easy and delicious!


Friday, March 29, 2013

How to Cook Whole Trout

"Guess what, I have a surprise for you!"
says the Airman in uniform coming through the door and holding his gym bag.
"Um...a cat brother for Trink?"
Nope. He pulls out a ziploc bag with two whole, fresh trout.
"...where did you get those?"
"Don't you worry about that..."
 
Medium length story made short, someone he works with is really into fishing and apparently caught enough trout to share. My husband was quick to volunteer his wife as someone interested in cooking whole fishes (and he was right).

As part of our life goals, when we grow up JoJo and I have decided want to be Phil and Kay Robertson (Duck Dynasty anyone? We are addicts!). Kay is adorable and can cook anything and Phil is a sardonic, bearded, redneck genius. They have great traditional values and they have been married over 50 years and are completely in love. They are also hysterically funny. Sound like good role models to me!
Cooking fresh fishes seems like a good place to get some more practice for moving toward that goal. I do cook fish pretty much weekly, but typically it is salmon and never does it ever have eyes and fins and all that. Thankfully the guy who gave them to him already gutted them out, so I don't have to worry about that part.
I have been browsing for trouty recipes; I slightly tweaked this recipe I found here. Instead of pan cooking, I baked mine (because I didn't have a pan big enough to fit 2 fish). I also added parsley and oregano.

Anyway:
 
Step 1: Well...I guess you'd have to either buy or catch your own trout and possibly gut it, but I managed to skip that step. (Pretty sure these are Brook Trout and not Rainbow, by the way)
 
Step 2: you might could want to take some photos with your raw trout. At least I wanted to. Bonus points for singing Gollum-like songs. Did I mention "I am different than most women"?
 
Step 3: Heat your oven to 350 and put some olive oil in your pan.
Step 4: Slice lemons thin and stick them inside the fish (which has been slit open due to the gutting and all that). Also insert about 3 cloves of garlic, minced. I also made a mixtue of salt, pepper, oregano and parsley and rubbed that on the inside of the fish. Just a little pinch of each, along with a little more olive oil.
Step 5: Bake in the oven for about 20-25 minutes (all depends on the size of your fish. The skin should get slightly crispy and the fish should be slightly flakey).
 
Step 6: ENJOY! So fresh and tasty! (Now, if you are wondering how you go about EATING it, like I was, this link here might be helpful!) We served ours up with some brown rice, homemade bread and asparagus.


I hope some of you get a chance to try it! This was our first experience with a fish not purchased in a store (one more step furthering us from being "yuppies"). Definitely very different from our usual salmon preference, but quite delicious nonetheless!


Tuesday, March 26, 2013

Thrifty Thinkin': Repurposed and Painted Jars for Cute Pantry Storage

As you know, I've been trying my hand at attempting to make as much of our food from scratch and buy as little packaged/process/pre-made foods as possible. But there are still plenty of things that I buy that come in some sort of container, like pasta sauce (although, soon I will be making our own!) and salsa. Often those jars, either plastic or glass, can be reused to store something else. Some of them are actually pretty cool too (Classico pasta sauce comes in a mason- type jar!).

 
 I've always tried to reuse containers whenever possible. Typically I remove the labels with hot water and a sponge and then send them through the dishwasher once. Then I use the jars to organize some of my pantry items, like dried beans, popcorn kernels or rice. After a little while though it was starting to look chaotic with a bunch of sharpie-labeled random jars with lids that didn't match the contents (such as Ragu lid on Kidney beans).


That bugged me. Plus, I am always down for a craft project, so I decided to give those jars a little make over.

First, I picked up a can of Krylon Indoor/Outdoor (basically good on any surface) spray paint in my favorite shade- Cherry Red- at Michael's (40% of with coupon, so around $3.00).
This part was quite the process. I guess I over-estimated the power of spray paint. I brought the lids outside and soon realized that it might just take 3 million coats to cover up the lettering on the lids. But with a little patience (and a final coat count of 5) I got them to be thoroughly Cherry Red. In hind sight, some sort of white primer would have been a really good idea. But it worked regardless.

Next came the fun part. Painting random designs all over the red lids. They don't actually match, they just sort of...coordinate, which is basically a summation of most things I surround myself with. I love color and these lids are sure colorful now. I used an array of acrylic paints and just fooled around with flowers and patterns until I was happy with my lids.


I allowed them to dry for a couple hours and gave them each two coats of  glossy acrylic Americana Sealer (also from Michael's, 40% off for about $3.00).

After letting them dry overnight, I put them back on my jars and now they are super spiffy and bright!


I still have plenty of spray paint left over, so my plan is to continue adding jars and painted lids to my collection as I empty out store bought products. Now my pantry makes me smile! Art belongs everywhere!

Only caution with these is that they are NOT washable. I don't really care since the contents will be pretty consistent and dried beans don't make much mess, but you wouldn't want to try and store anything wet or messy in them. If cleanup is needed, a damp paper towel should do the trick.

These would also be great for office storage for little bits and pieces like paper clips. Or, great in a bathroom for things like cotton balls and Q-tips too! You can make them match your decor! It would also be a fun project for kids to help out with (adults do the spray painting and varnishing, but let kiddos decorate!). I'm thinking it would be super cute for a little girls room/bathroom for storing little hair clips and dainty whatnots.

It is really fun to find purposes for everyday items, especially if they are cute! Let me know if you give them a try!

LinkWithin

Related Posts with Thumbnails