Showing posts with label Creativity. Show all posts

Monday, June 24, 2013

DIY: How to Make a Backyard Firepit Out of a Salvaged Dryer Drum

My husband and I are fire fans. Fans of fire. Bonfires in particular.

We live on a military base and have a very small fenced in back yard, but we didn't want to have to experience summer here without being able to enjoy evenings outside by a blazing fire. We had been looking for months hoping to find a nice looking, good quality and reasonably priced fire pit, but it seems that all the remotely nice ones were $80 at least, some even up to $200. That just seemed outrageous for me. I had been weekly checking craigslist hoping on would pop up, but while I was waiting I was seeking out alternatives. At first we thought we might cut down a large metal barrel and just use that, but then I stumbled upon a most genius idea (thank you, pinterest): FIRE PITS MADE OUT OF WASHER/DRYER DRUMS!

 
The moment I saw that people were converting the insides of washing machines into bonfire receptacles I knew we had to make one. I was very surprised when I was able to find a drum on Craigslists just a few days later. The man selling it had it listed as a Washer drum, but upon further inspection we have decided it in an industrial/laundry mat sized drum from a dryer. I am not sure how he came upon it, but that is no matter. It had already been removed from the actual dryer and for $25 it was ours! (If you wanted to create something similar I recommend looking for old washers/dryers out to the side of the road, or finding a cheap salvage place. I've heard that the drums are easy enough to remove, but hopefully you get lucky like us and someone does that step for you.).

drum, upside down, before we did anything to it
 
It was a bit of a process start to finish, but we love the way it came out. The way we went about creating it might not be possible to everyone, as we have access to a lot of equipment and tools, due to my husbands job maintaining structures for the Air Force. However, with a little craftiness and know-how, you could easily create something similar on your own. 
 
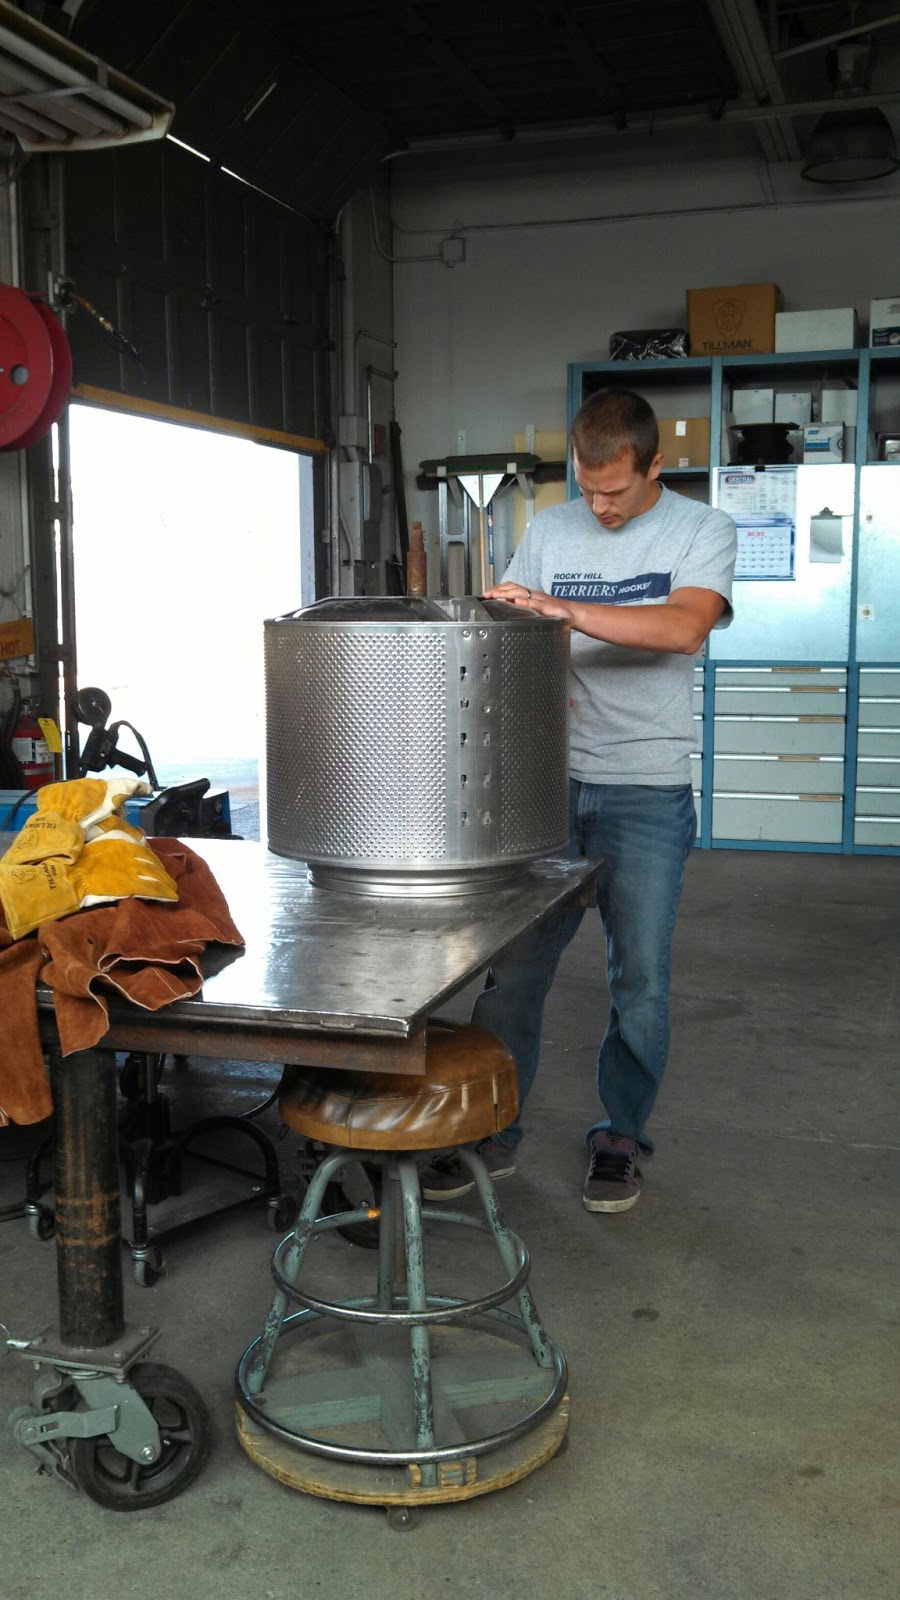
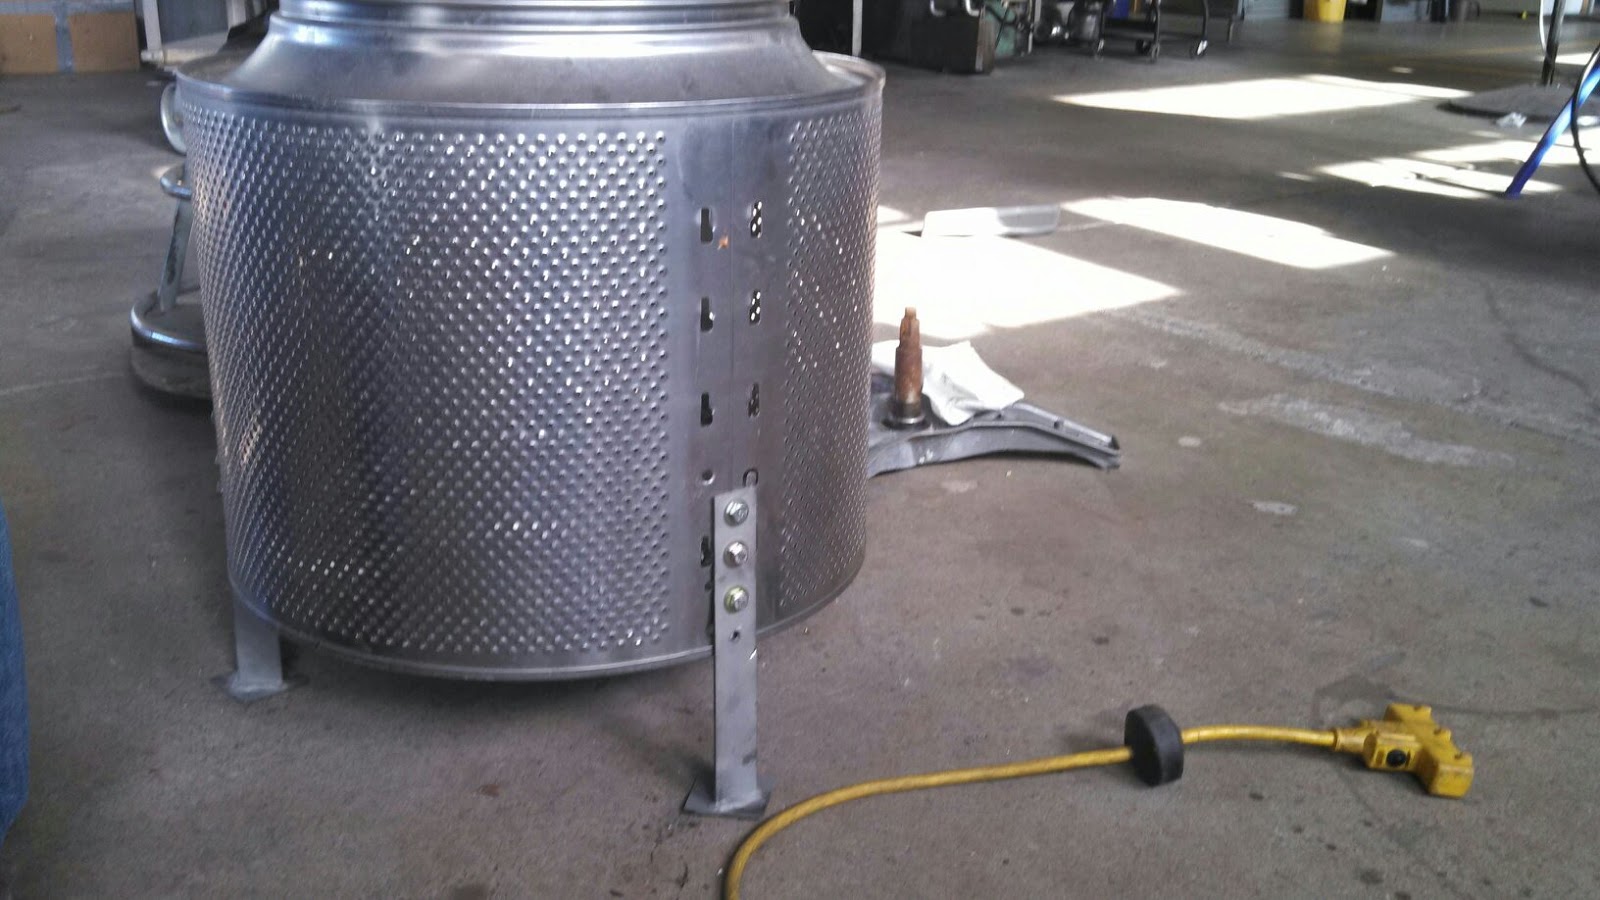
In summary we-actually he, while I took pictures- took off the...spike...on the back (some part which connected it to the dryer; it was just screwed in) and removed all plastic parts from the inside.

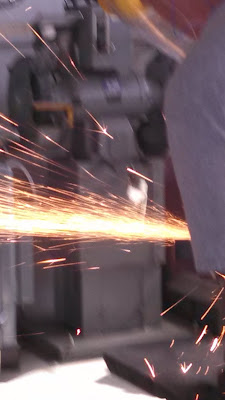
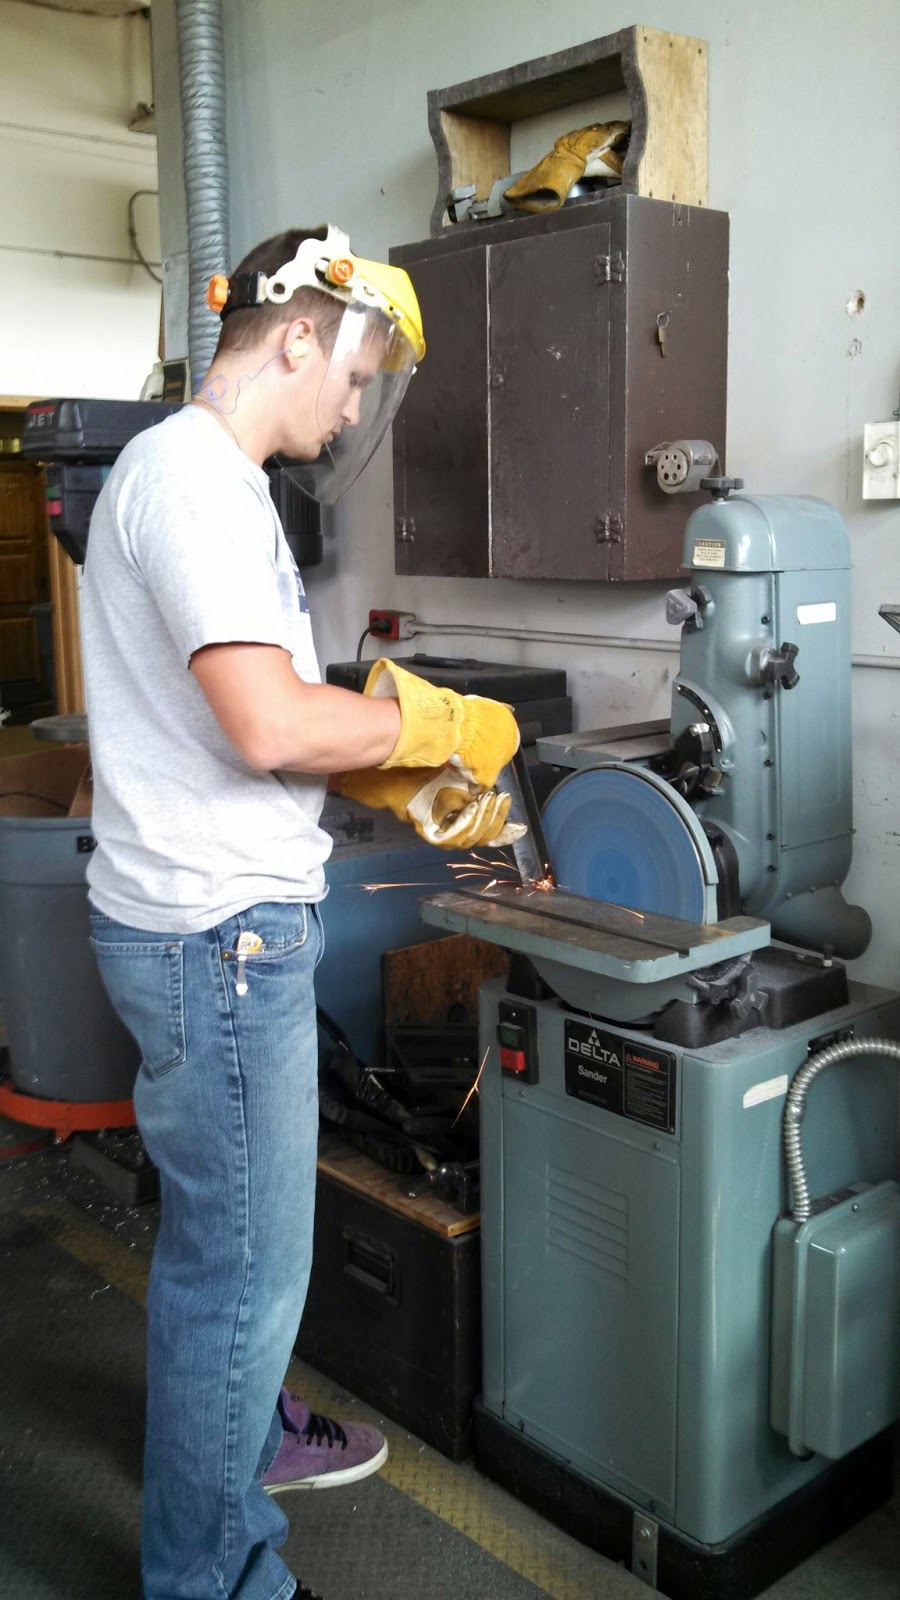
Next, he drilled some extra holes in the bottom and top, just to allow water to drain (all the holes in the sides are part of the drum design and they make for really great air flow!). Then it got trickier: my husband welded three legs with feet on the bottom, punched holes in them, sand blasted them and screwed them onto existing holes in the drum.
You could definitely do without the legs, but we thought it gave it more of a finished look. Another option would have been to leave the spike on the bottom part on and drive it into the ground for stability. But, if you have welding skills, put them to use!


After he had done all the tricky bits at his shop, we brought it home and I painted it with 3 coats of black Rust-Oleum high heat spray paint. That was about $7 at Lowes; it is made for grills and can withstand heat up to 1,200 degrees F. NOTE: ONLY PAINT THE OUTSIDE PARTS ON IN CONTACT WITH THE FIRE! Paint really made it look finished and it so far holds up very well to the high temperatures.

We love how it turned out! We've had several fires and are looking forward to many more with this lil' beauty. We had a lot of fun working on it. Start to finished it took us between 3 and 4 hours, and cost us $32! Function and frugal, not to mention a pretty good conversation starter. We couldn't be happier!

Thursday, May 9, 2013

And that's all my phone has to say about that...

flash back to last Friday- make chocolate covered yumminess.
pretzels and peanut butter balls. high in both calories and deliciousness.
they were so yummy people who had said they weren't coming showed up upon being texted about the chocolate goodness.
 
the week started out terribly sunny.
Washington was actually like the warmest state in the USA at one point over the weekend. It was miraculous. 0% chance of rain- that just doesn't happen out here!

flowers picked on the hike mentioned in the previous post.
 
at first i thought I acquired poison ivy on the hike when I woke up with a rash on my arm the next day.
when within hours I was a completely rashy mess we began to think a food reaction was the culprit.
that and my husband suspected I was turning into a goose (...looked like I had goose bumps everywhere...). Yup.
 
 Next was a 101  fever.
long story short, I spent about 5 hours on Monday between the doctors, a blood lab and the army base pharmacy. i know I have a monosodium glutamate (MSG- a common food additive which acts as an excitotoxin and messes with my endocrine system) allergy and i accidentally ate some (its in the majority of packaged food). the dr. also did a panel of food allergy tests on me. waiting on results. i am now armed with epipens and after a bunch of steroids and Benadryl I'm doing much better. fun times.
 
we've started feeding birds in hopes of giving our indoor kitty something to entertain himself (and cause we like birds).so far, a couple of brave chickadees and a squirrel picking up what drops to the ground have been our only visitors.
 
trink thinks the squirrel is good fun. we call the squirrel Caliban
(also, like Trinkilo, a character from the Tempest).
Funny part is he didn't notice him at first and the squirrel stood frozen for a couple minutes before the cat whipped around and gave him full attention.
 
another really great cat hobby is running around underneath a shoe box. the goal being to keep it on top of you so you may stealth attack people's ankles.
 
gearing up for Hawaii in 10 days!!! so excited!
we will be staying at a military personnel resort right on Waikiki beach. Celebrating our one year anniversary during the trip. Unbelievable! Until then, we are watching every movie set in Hawaii- most importantly Lilo and Stitch. JoJo has 3 day weekend so let the amping up for the trip begin!


Tuesday, April 30, 2013

Thrifty Thinkin': Homemade Syrup-Filled Banana Pancake Bites

Yet another quick and easy breakfast to make ahead and enjoy all week: Pancake Bites!

As we know, I love cooking anything I possibly can in my muffin pan. I also try and cook a week's worth of breakfast on Sunday afternoon, so I can quickly reheat in the oven or microwave. This way my Airman husband gets a decent homemade breakfast before he is out the door at 6:30 and I get to not get up at the butt-crack of dawn and cook for him. Win-win.

Last week I made syrup-filled mini pancakes, or "pancake bites" in my muffin pan and my husband enjoyed them all week long.

You'll need:
*oh, and your favorite syrup will be necessary too. The real stuff is always the best!!

*preheat your oven to 350!
*I used about a cup and a half of dry pancake mix and added the needed ingredients accordingly. Follow whatever your normal pancake routine would be. My cup and a half came out to 8 little pancakes/muffins.

*doesn't have to be bananas. pick your favorite pancake filling, or leave them plain!

*adding the syrup after the 10 minutes allows for them to be syrup "filled." If you mix it in with the batter it would sort of cook off by the time 25 minutes is up

*though these are called "syrup filled" I suppose they are more syrup "infused." When you bite into one it isn't like a fruit gusher (why can I not think of a better example!?) or a jelly filled donut- nothing will ooze all over your hands. The syrup soaks into the mostly-cooked pancake batter. When they are done you can still taste the syrup and they are a little sticky, but it has dispersed throughout the pancake bite. You could do without syrup, but I think it makes them more like pancakes and less like muffins. Another option would be to bake them plain and dip them in syrup later if you aren't rushing out the door.
*easy reheat: 5 minutes back in the oven at 350 or 45 seconds in the microwave. Keep in the fridge (in plastic baggie) to enjoy all week long!


Thrifty Thinkin': Easy, Homemade Peanut Butter (Reese's) Brownie Bites

This post will be short and sweet. Very sweet, with a hint of peanut butter.

My husband is a brownie addict, as I have mentioned before. Although, more than he loves brownies, he loves Reese's Peanut Butter Cups. So of course, a recipe combining the two is an automatic win.


This is one of my favorite ways to make brownies and one of his favorite recipes to devour. It is basically like making a regular batch of brownies, only I bake mine in a muffin tin. In the above photo you can see aluminum foil; I line the tins with it for easier removal from the pan. You could also use cupcake-type liners.

To make your own Reese's Brownie bites, follow whatever instructions your usual brownie mix gives you. I make my own mix to be frugal, as well as to avoid unnecessary chemicals and unpronounceable ingredients in our brownies. You can find my recipe here!


 Once you have your brownie batter all mixed up, divide it evenly into a grease (and lined) muffin pan. Insert 1 Reese's peanut butter cup into the center of each. Bake just like you would for your regular brownies. Let cool and remove from the pan. They are a great little treat and easy to pack into lunches! Enjoy!

Sunday, April 28, 2013

Hand-Painted Art for My Kitchen: "Where You Invest Your Love..."

This post has been a long time coming. This project was finished a couple weeks ago, but I was waiting to get it hung up (with the help of my husband) before posting.

As you know, I live in a little cook-cutter, white walled, baby house on an Air Force Base. Base housing is far from character-filled...in fact it is a little stark white and very un-personal. We are allowed to paint or hang stuff, but it must be returned to the state we found it in upon leaving, which being in the military, you never can be sure when that will be. Someday we will live in an old house, full of charm and character, but for today we don't. For now, I am trying to make my little baby house as homey, charming and personal as I can without investing to much into it, as it is, after all, only temporary (only probably a year or so).

We were able to purchase plenty of furniture for our house together and now I am left with the task of doing the little ("girly") tasks of decorating. I'm not a huge fan of white walls, and white walls without art are super sad. I, however, have trouble finding art that I like within our budget, so I have therefore be doing the DIY thing (which I do anyway but..).

About a month back on a weekend, my husband and I were at his shop (he works in a Civil Engineering Squadron doing Structures). They have a bin of junk wood and scraps. He was throwing some stuff in there when I spotted this...cabinet door-like thing...
I am still not sure what it was. Looks like a cabinet door, but it has 6 weird little hooks on it, and no signs of and hinges ever being there so...it's a mystery. But I liked it. It looked like it wanted to be painted on. I waited another week of it being in the scrap bin before I ..*pilfered* it for my own.

I decided on painting some of my favorite song lyrics on it. "WHERE YOU INVEST YOUR LOVE, YOU INVEST YOUR LIFE." (Mumford and Sons: Awake, My Soul). If I was the sort to get tattoos, that would already be on me somewhere, but as I am not quite that sort I figured painting it as art for my kitchen was a close substitute. I pondered getting some stencils to make the letters crisp and precise, but that is not really indicative of myself. Instead, I free handed it. I did pencil in some lines to help keep it all straight- I have an horrible inability to make straight lines without ruler guidance.
 Lyrics alone don't make a painting for me, so I bordered it in some Hungarian-inspired flowers. Hungary has some gorgeous embroidery which has always been part of decorating my family's home (my grandfather was from Hungary and one of my sisters is adopted from there), so I decided to bring some into mine.I am incapable of embroiderying such beauty, but painting it is fun.  I considered painting flowers to also mimic Polish paper art (called Wincynanki), to honor my Polish heritaged husband. But it is incredibly detailed and when I practiced on other paper my flowers looked awful in paint, so I scratched that plan and stuck with my own roots. When I finished my couple days of painting it, I sealed it with spray varnish.
I am pretty pleased with how it came out. It's unique, I think. That's probably why I like it so much. JoJo helped me get it screwed into our kitchen wall and it now is hanging over our little dinning area. Just one more little bit of homey charm to our house!
Still a little stark and sad, but getting happier! If you can't tell, I'm a fan of color. You can't see the rest of my kitchen in this photo, but all the colors present in the flowers are basically the color scheme of my kitchen. Anything with a folksy print, bright color, or vintage vibe is welcome. I suppose salvaged cabinet door wall art fits in nicely.
 

Friday, April 26, 2013

And that's all my phone has to say about that:

Saturday we spent the day with my husband's public speaking class.
The kind professor is also a local pastor, and he brought the class out of their classroom and to his church to use the mic in a big space. Then he had us all to his beautiful home and fed us. Not like the usual hot dog cook out- an entire Salmon! I brought cookies.
 
Customary never-ending fascination with boxes which all cats possess.
 
Knitting a blanket.
I've crocheted many, but knitting is much slower going for a project this big. Been at it for months and only 45 squares in. By fall I WILL have a nice Queen sized stripey blanket. I love how it looks so far!
 
This mama's boy has to get himself into everything I do. He is such a good helper.
 
Been learning to drive stick on my new (used) car. Finally, we are a two vehicle family!
Husband bought it from a friend relocating to Japan.
 It's a Teal 1996 Nissan 200sx. (haven't gotten pictures, but this one here is what it looks like)
 I tried to learn driving standard at age 17 and failed but I'm happy to say with my husbands help I'm doing much better this time around and there has been minimal stalling.
Also, my previous driving experience has been my family Suburban, my Durango, and my husband's Dodge Ram. A little car is a new thing to me. 40 mpg is nice though!!
 
Tip: don't make the same mistake we did. You don't need both a cat and a paper shredder.
 Most cats are willing to help with shredding (not being serious, but he sure is a good shredder)
 
Been dehydrating fruits in my oven (post to come).
I think they are super delicious. JoJo does not.
 
Meal planning: it is a good thing. But we are pretty routine people. Tacos on Tuesday, Breakfast for Dinner on Wednesday and Fishes on Fridays. Only have to get extra creative on Monday and Thursday. It works for us. (and yes, we do eat on the weekend, but I don't try and plan it.)

Somehow the Word of God always seems to make more sense and impact me more when I am outside.
Ive been talking walks in the lovely weather (praying as I go- something my friend Jeri taught me)down to a pond on base and doing my study (this one from my church!) there.
I always take notes and doodle when I read the Bible. It just works for me.

seriously wish I could sleep in a literal ball like this.

out for a spring time walk. Finally some sunshine around here! Weather in the 60's!
 (anyone know what type of tree this is? blossoms were all...fluffy and pompom-y...not a cherry tree?)

Not sure how it got there but a section of our garden area by the front door is FULL of mint (because mint will do that. it takes over everything). Brought some inside and been making tea!
 
Blinds are super ugly, but a nice sunset peaking through makes them a little bit better.
 
 
**Wanna apologize if these posts are super random, but they are more for the benefit of my folks back home than anything else. Hope they aren't annoying you too much. Just try and tolerate me and my excessive cat photos, please.

LinkWithin

Related Posts with Thumbnails